RELION on Sulis
RELION is a software package for electron cryo-microscopy (cryo-EM) structure determination.
The following assumes that users have a directory named relion_project in which they either wish to create a new RELION project or in which one already exists. It also assumes that users have connected to Sulis from a device running an X11 server which can display the RELION GUI. For example, connecting using ssh -X from a Linux machine, a Mac running XQuartz, or a Windows machine running Xming. Seek support if you need help with this.
- Running the RELION GUI as an interactive job (CPU only version)
- Running the RELION GUI as an interactive job (GPU enabled version)
- RELION as a batch job
Running the RELION GUI as an interactive job (CPU only version)
RELION mustn’t be run interactively on the login node of Sulis. Instead, request an interactive job and run RELION using the server resource allocated.
RELION can perform many operations, some of which benefit from MPI parallelism and threaded parallelism. In the language of SLURM the number of tasks is the number of MPI processes RELION can use, and the number of CPUs is the number of simultaneous threads that can be used by each MPI process. Consult the RELION manual to select an appropriate resource request for your job.
In this example we request a 10 hour interactive job with 1 task and 12 CPUs per task. Replace suxxx-somebudget with your own budget code.
[user@login01(sulis) ~]$ salloc --account=suxxx-somebudget -N 1 -n 1 --cpus-per-task=12 --mem-per-cpu=3850 --time=10:00:00 --x11
Note the importance of the --x11 flag to indicate that we intend to run a graphical application with the requested resources.
Once your job has been allocated resources, you will receive an updated command prompt indicating that subsequent commands will execute on the server allocated to your job. In this case node046.
[user@node046(sulis) ~]$
Load the CPU version of RELION as an environment module.
[user@node046(sulis) ~]$ module load GCC/11.3.0 OpenMPI/4.1.4 RELION/4.0.0
Then change working directory to your project directory and launch the RELION GUI.
[user@node046(sulis) ~]$ cd relion_project
[user@node046(sulis) ~]$ relion &
This should display the main RELION GUI as per below.
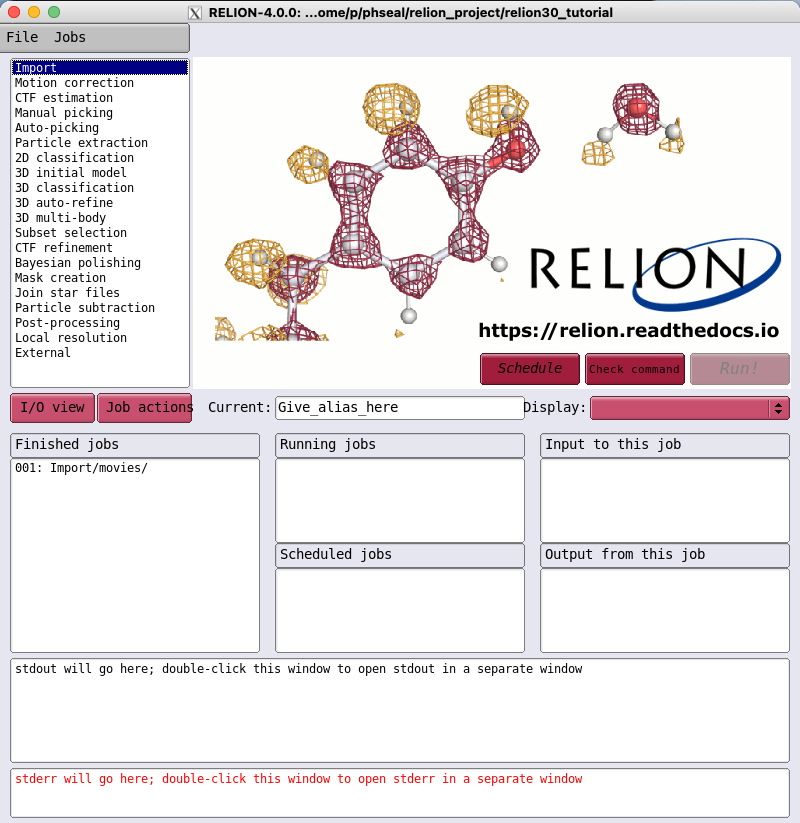
Running jobs within the interactive resource allocation
Work that can usefully be run with just the CPU resource allocated to your interactive job can be launched directly from the GUI. Switch to the “Running” tab for the type of work you wish to perform, in this case the Motion correction example from the RELION tutorial. We requested 1 task and 12 CPUs per task for our interactive job, so can set MPI procs to a maximum of 1 and number of threads to a maximum of 12.
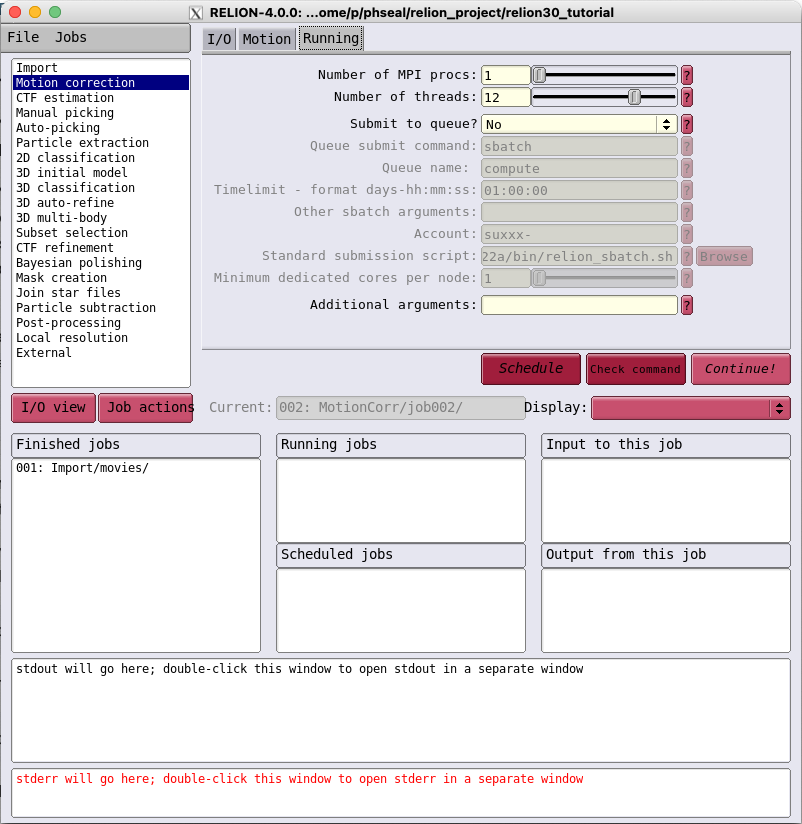
Once the job parameters have been defined just click “Run!” and the job will run within the interactive resource allocation.
Submitting SLURM batch jobs from within the GUI
Jobs that need more CPU resource can be offloaded to additional SLURM jobs launched from the GUI. Select the “Running” tab and change “Submit to queue” to “yes”. This will enable additional input boxes as below.
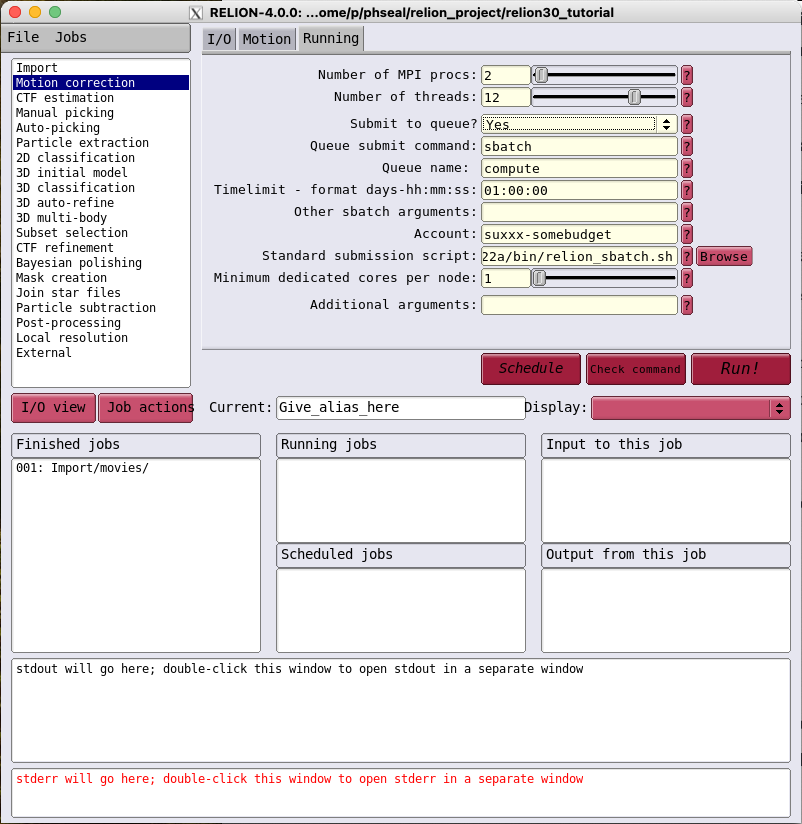
These should be mostly pre-configured automatically. Users should only need to change the following.
-
Queue name. This should be set to
computeby default and should not be changed in most cases. For CPU jobs that need higher memory it may be sensible to specify thehmemorvhmempartitions instead. See the resource limits page for information. -
Timelimit. This should be set to an amount of time during which the job is expected to complete and is subject to the same limits as jobs submitted at the command line.
-
Account. This should be set equal to the CPU budget code for your allocation of CPU time on Sulis.
With those fields populated, clicking “Run!” will submit the job to the SLURM batch queue. Note that if the job needs to run for longer than the lifetime of your interactive session this is fine. The job will reappear within the GUI when subsequently re-launched in a new interactive session.
Running the RELION GUI as an interactive job (GPU enabled version)
At the time of writing, the RELION manual indicates that only the Auto-picking, 2D classification, 3D classification and 3D auto-refine job types can benefit from GPU acceleration. To take advantage of this acceleration we need to run the GPU enabled version of the software.
This proceeds in a very similar way to the CPU version. The first important difference is that we now request our interactive session via the gpu partition and request that a GPU is allocated to our job.
In this example we request a 10 hour interactive job with 1 task, with 12 CPUs and 1 GPU per task. Replace suxxx-somebudget with your own GPU budget code. We don’t explicitly specify a type of GPU, so will be allocated whichever is available.
[user@login01(sulis) ~]$ salloc --account=suxxx-somebudget -N 1 -n 1 --cpus-per-task=12 --mem-per-cpu=3850 --time=10:00:00 --part=gpu --gres=gpu:1 --x11
Note the importance of the --x11 flag to indicate that we intend to run a graphical application with the requested resources.
Once your job has been allocated resources, you will receive an updated command prompt indicating that subsequent commands will execute on the server allocated to your job. In this case gpu016.
[user@gpu016(sulis) ~]$
Load the GPU version of RELION as an environment module.
[user@gpu016(sulis) ~]$ module load GCC/11.3.0 OpenMPI/4.1.4 RELION/4.0.0-CUDA-11.7.0
Then change working directory to your project directory and launch the RELION GUI.
[user@gpu016(sulis) ~]$ cd relion_project
[user@gpu016(sulis) ~]$ relion &
This should display the main RELION GUI as per below.
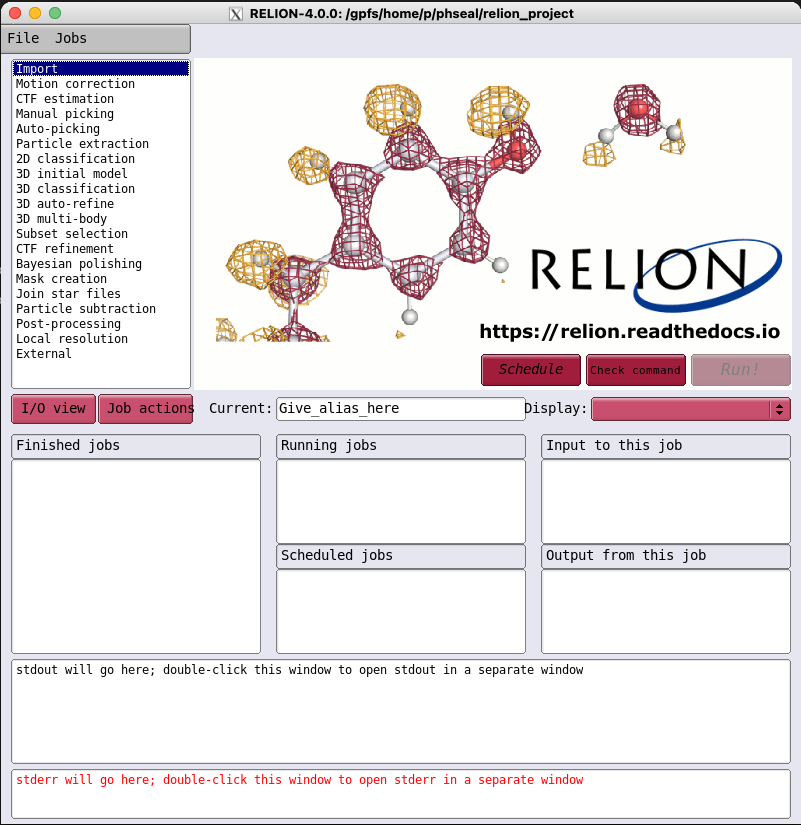
Running jobs within the interactive resource allocation
Work that can usefully be run with just the CPU and GPU resource allocated to your interactive job can be launched directly from the GUI. Switch to the “Running” tab for the type of work you wish to perform, in this case the Auto-picking example from the RELION tutorial. We requested 1 task and 12 CPUs per task for our interactive job, so can set MPI procs to a maximum of 1 and number of threads to a maximum of 12.
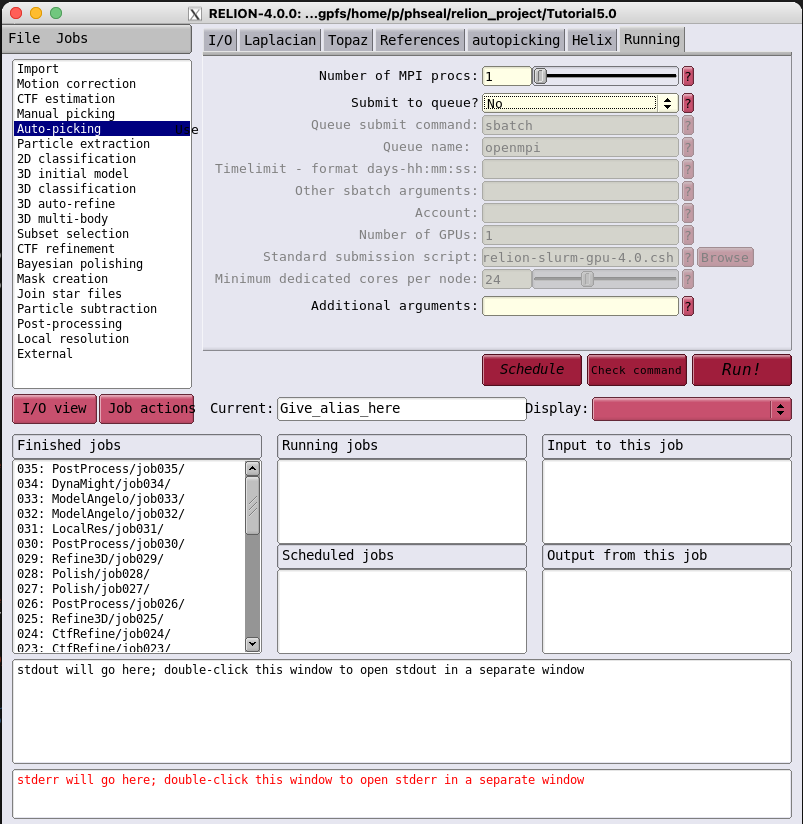
Once the job parameters have been defined just click “Run!” and the job will run within the interactive CPU and GPU resource allocated.
Submitting SLURM batch jobs from within the GUI
As with the CPU version, jobs that benefit from GPU acceleration can be offloaded from the GUI by setting “Submit to queue” to “yes” within the “Running” tab. This will enable additional input boxes as below.
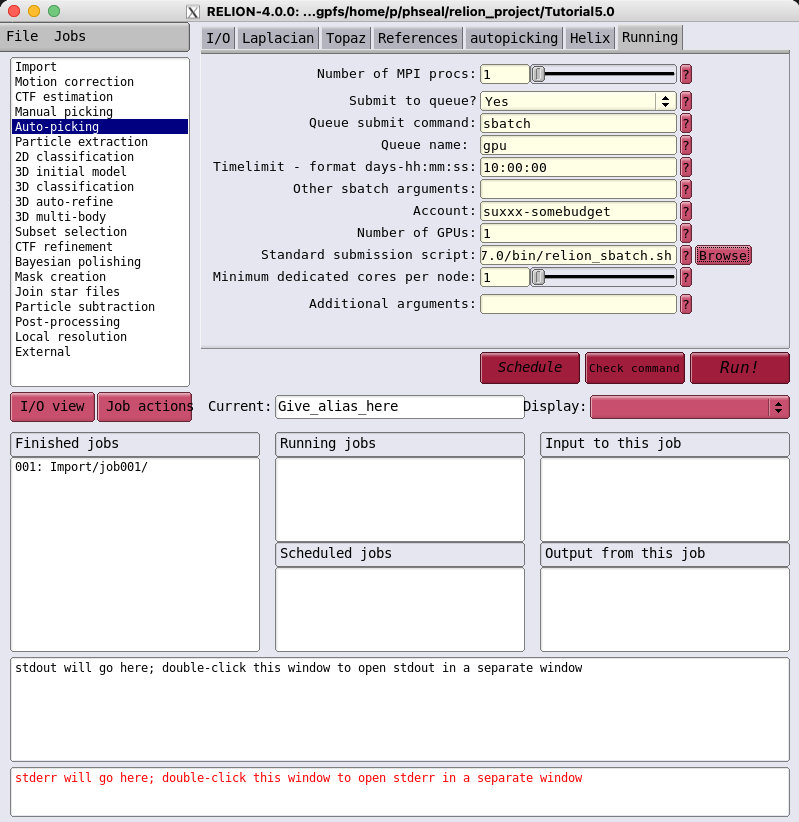
These should be mostly pre-configured automatically. Users should only need to change the following.
-
Queue name. This should be set to
gpu. -
Timelimit. This should be set to an amount of time during which the job is expected to complete and is subject to the same limits as jobs submitted at the command line.
-
Account. This should be set equal to the GPU budget code for your allocation of GPU time on Sulis.
With those fields populated, clicking “Run!” will submit the job to the SLURM batch queue. Note that if the job needs to run for longer than the lifetime of your interactive session this is fine. The job will reappear within the GUI when subsequently re-launched in a new interactive session.
RELION as a batch job
Typically, RELION is used via the GUI with jobs run directly from there or submitted to the queueing system as described above. However RELION can also be run entirely as a batch job without needing the GUI.
Consider for example the following GPU job script:
relion.slurm
#SBATCH --nodes=1
#SBATCH --ntasks-per-node=1
#SBATCH --cpus-per-task=1
#SBATCH --mem-per-cpu=3850
#SBATCH --partition=gpu
#SBATCH --gres=gpu:1
#SBATCH --time=15:00:00
#SBATCH --account=suXXX-somebudget

module purge
module load GCC/11.3.0 OpenMPI/4.1.4
module load RELION/4.0.0-CUDA-11.7.0

srun relion_refine_mpi \
  --i Particles/shiny_2sets.star \
  --o output/run \
  --ref emd_2660.map:mrc \
  --ini_high 60 \
  --pool 100 \
  --pad 2 \
  --ctf \
  --ctf_corrected_ref \
  --iter 25 \
  --tau2_fudge 4 \
  --particle_diameter 360 \
  --K 4 \
  --flatten_solvent \
  --zero_mask \
  --oversampling 1 \
  --healpix_order 2 \
  --offset_range 5 \
  --offset_step 2 \
  --sym C1 \
  --norm \
  --scale \
  --j 1
  --gpu "1" \
  --dont_combine_weights_via_disc \
  --scratch_dir ${TMPDIR}
This can be submitted with sbatch (from within your RELION project directory) in the usual way.
[user@login01(sulis) ~]$ sbatch relion.slurm
A detailed description of all the command line arguments to relion_refine_mpi is beyond the scope of this note. However users may first wish to experiment with submitting jobs to the queue via the RELION GUI, and adapting the resulting job scripts to create their own based on the above template.